Colorful polka dot nails are one of the easiest and most playful ways to create a beautiful manicure at home. This nail art style combines colorful dots with simple base colors to create designs that look fun, stylish, and eye-catching. Whether you prefer short natural nails, long almond-shaped nails, or classic square nails, polka dot nail art can be customized to suit your personal style.
One of the best things about colorful polka dot nails is that you do not need professional nail art skills or expensive tools to achieve a beautiful result. With a few nail polish colors and a simple dotting tool, toothpick, or bobby pin, you can create countless unique designs. From soft pastel dots to bold rainbow patterns, there is a polka dot manicure for every season, occasion, and mood.
- Classic Colorful Polka Dot Nails
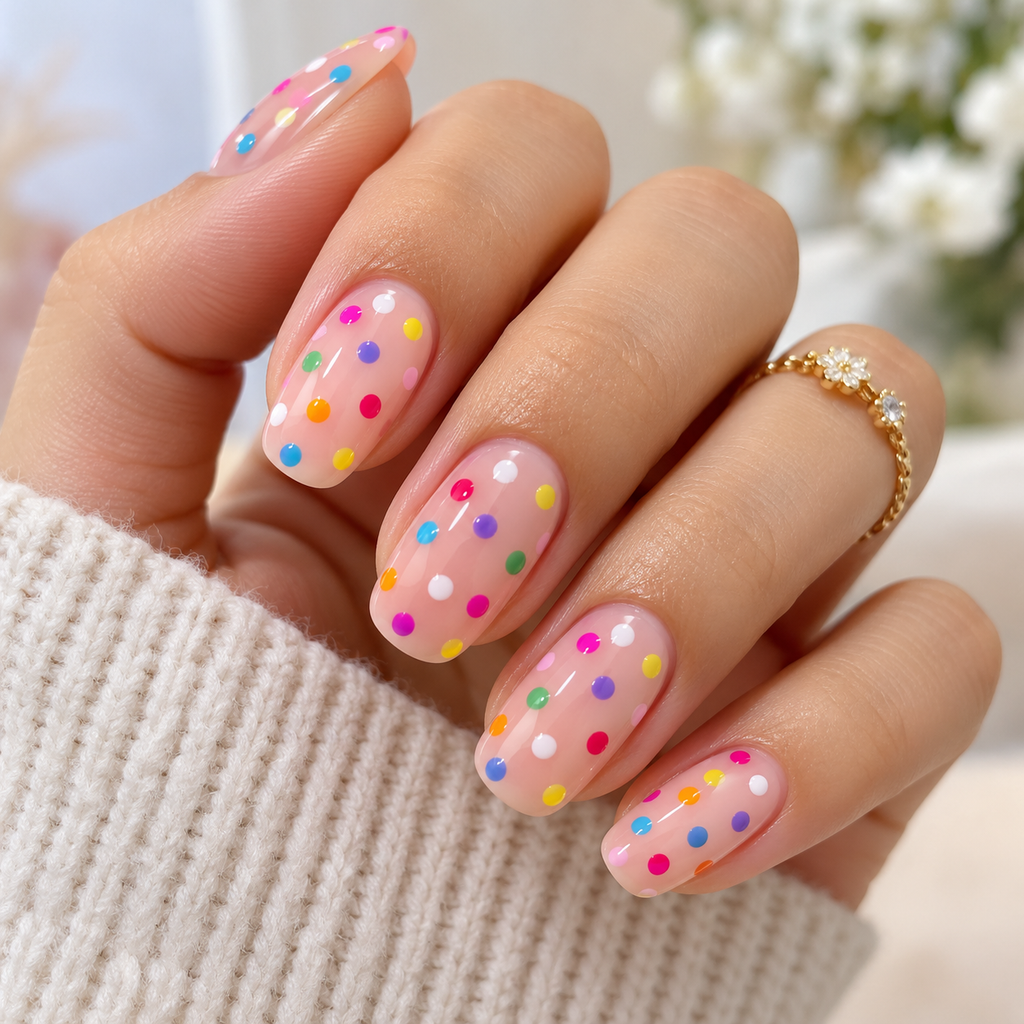
Classic colorful polka dot nails are perfect for anyone who loves a simple but cheerful manicure. Start with a white, nude, or light pink base coat and allow it to dry completely. Then, add small dots in different colors, such as pink, blue, yellow, green, purple, and orange.
You can arrange the dots in neat rows or place them randomly across each nail. For a balanced appearance, keep the dots approximately the same size. If you prefer a more playful design, combine large and small dots.
This style works beautifully on short and long nails. It is also a great choice for beginners because the design does not require complicated patterns or precise drawing skills.
- Pastel Polka Dot Nail Art
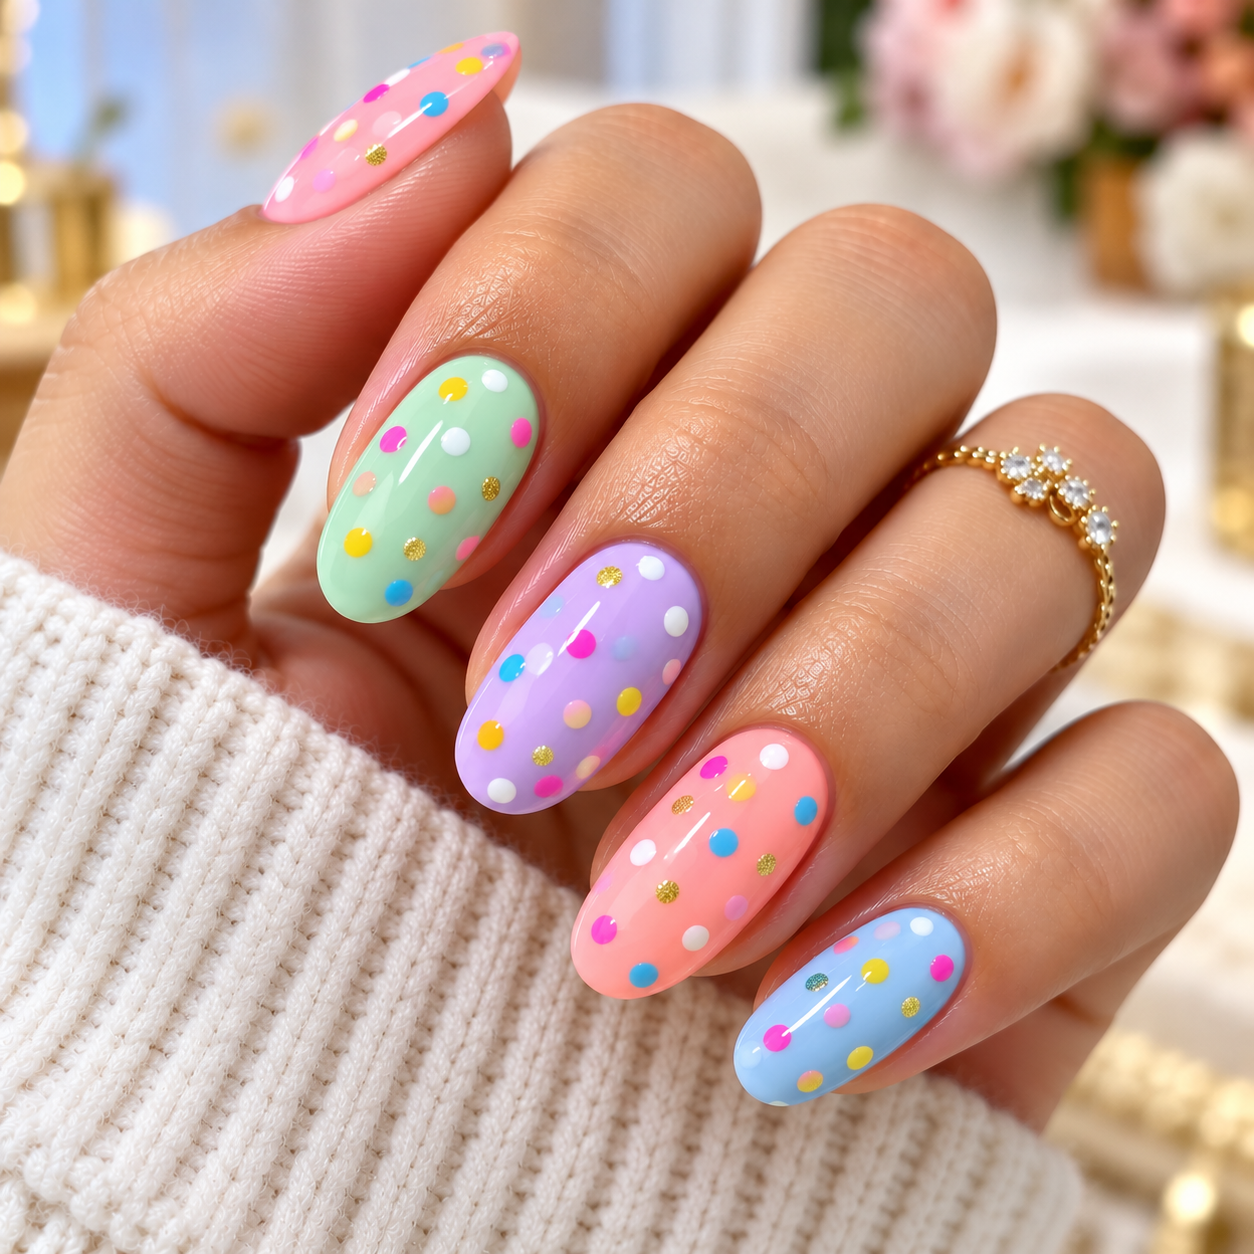
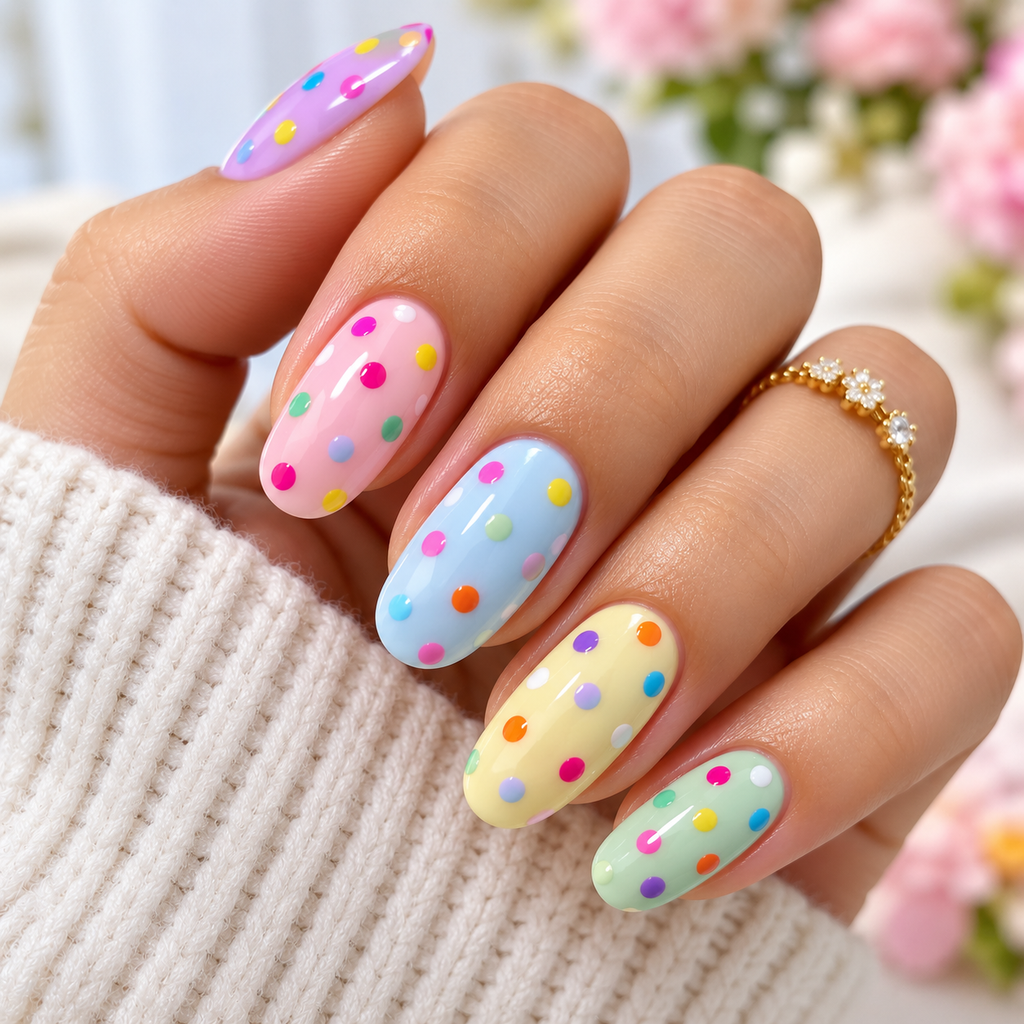
Pastel polka dot nails create a soft, delicate, and feminine appearance. This design is ideal for spring, summer, birthdays, picnics, and everyday wear.
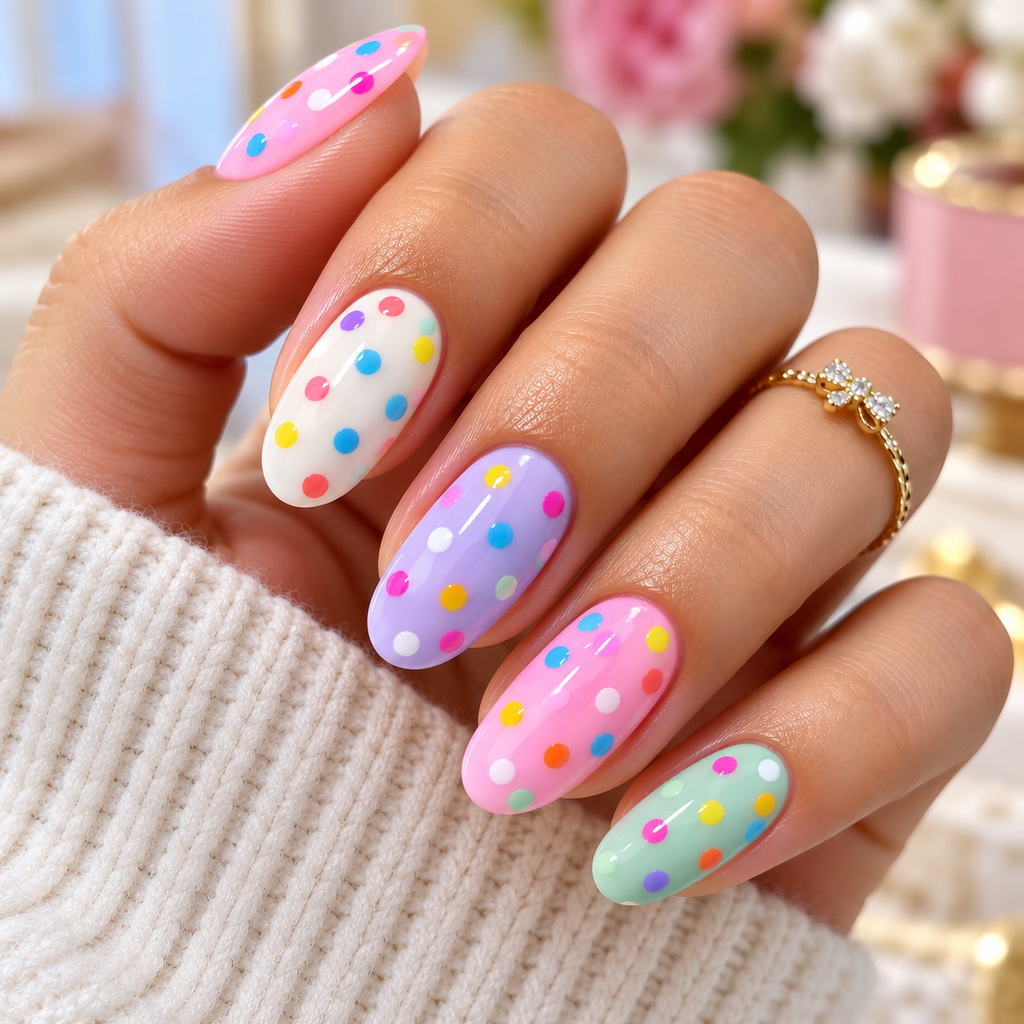
Choose a pastel base color, such as baby pink, lavender, mint green, pale yellow, or sky blue. Add dots in complementary shades to create a gentle and harmonious color combination.
For example, a baby pink base with lavender and white dots creates a romantic look, while a mint green base with peach and yellow dots feels fresh and playful.
You can also use a different pastel color on each nail while keeping the dot pattern consistent. This creates a coordinated manicure without making every nail look identical.
- Rainbow Polka Dot Nails
Rainbow polka dot nails are an excellent option for people who enjoy bright colors and creative designs. This style features dots in multiple rainbow shades, creating a lively and energetic appearance.
Begin with a white or transparent nude base. Add dots in red, orange, yellow, green, blue, and purple. You can place the dots in rainbow order or mix the colors randomly for a more relaxed design.
Another beautiful option is to create a different rainbow-inspired pattern on each nail. For example, one nail can feature vertical rows of dots, while another can have scattered dots of different sizes.
Rainbow polka dot nails look particularly attractive during summer, holidays, festivals, and casual outings.
- Polka Dot Nails with a Nude Base
If you prefer a more elegant manicure, nude polka dot nails are a wonderful choice. A nude base provides a natural-looking background that allows colorful dots to stand out without overwhelming the overall design.
Choose a nude, beige, soft peach, or milky pink polish. Add a few small dots in black, white, red, or pastel shades.
For a minimalist appearance, place just three or four dots on each nail. You can also concentrate the dots near the tips or along one side of the nail.
This design is suitable for everyday wear, office settings, casual gatherings, and occasions when you want something stylish but not overly bold.
- Black and White Polka Dot Nails
Black and white polka dot nails are timeless, versatile, and easy to coordinate with different outfits. Although this design uses only two colors, it can create several attractive looks.
For a classic appearance, apply white polish and add evenly spaced black dots. Alternatively, use a black base with small white dots for a bold, high-contrast manicure.
You can also create an alternating pattern by using black dots on some nails and white dots on others. Another option is to combine polka dots with French tips for a more modern design.
This style works well on short square nails, almond-shaped nails, and medium-length oval nails. It is suitable for casual wear, parties, and anyone who prefers a clean and graphic nail art style.
- Cute Pink Polka Dot Nails
Pink polka dot nails are perfect for creating a sweet, charming, and feminine manicure. You can use light pink, hot pink, dusty rose, or a combination of several pink shades.
For a cute design, begin with a pale pink base and add white dots. If you want a more colorful appearance, include tiny red, purple, or yellow dots.
You can also create accent nails by applying larger dots to one or two fingers while keeping the remaining nails simple. Adding small hearts or delicate floral details can make the design even more distinctive.
Pink polka dot nails are suitable for birthdays, date nights, holidays, and everyday styling. They also look beautiful in manicure photographs because the colors are soft and visually appealing.
- Short Nail Polka Dot Designs
You do not need long nails to enjoy beautiful polka dot nail art. Short nails provide an excellent surface for simple, neat, and colorful patterns.
For the best results, choose a light base color and use small dots that complement your nail size. Large dots can make short nails appear crowded, so keeping the design delicate usually creates a more balanced finish.
Try a clear base with colorful micro-dots, a nude manicure with tiny black dots, or pastel dots arranged near the tips.
Short polka dot nails are practical for everyday activities and easy to maintain. They are also ideal for people who prefer natural nail lengths but still want a creative manicure.
- How to Create Colorful Polka Dot Nails atHome
Creating polka dot nail art at home is simple when you follow a few basic steps.
Step 1: Prepare your nails. Remove old nail polish, shape your nails, gently tidy the cuticles, and clean the nail surface.
Step 2: Apply a base coat. A base coat helps protect your natural nails and provides a smoother surface for your polish.
Step 3: Choose your background color. Apply one or two thin coats of your preferred base color. Allow the polish to dry before adding the dots.
Step 4: Create the dots. Dip a dotting tool into your chosen nail polish and gently press it onto the nail. If you do not have a dotting tool, use a toothpick or the rounded end of a bobby pin.
Step 5: Experiment with patterns. Arrange your dots in rows, diagonal lines, clusters, or random patterns. Use different colors to create a personalized design.
Step 6: Allow the design to dry. Give the dots enough time to set so they do not smudge.
Step 7: Apply a top coat. Finish with a clear top coat to add shine and help protect your design.
For the cleanest results, wipe your dotting tool between colors and avoid picking up too much polish at once.
- Best Color Combinations for Polka Dot Nails
Choosing the right color combination can make your manicure look more coordinated and attractive.
Here are some combinations worth trying:
Pink and white: Soft, romantic, and feminine.
Blue and yellow: Bright, cheerful, and summery.
Lavender and mint green: Fresh, delicate, and modern.
Red and white: Classic, playful, and eye-catching.
Black and gold: Elegant and suitable for evening occasions.
Orange and pink: Bold, energetic, and colorful.
Nude and pastel shades: Subtle, stylish, and suitable for everyday wear.
You can also match your nail colors to your clothing, accessories, or seasonal preferences. Using three or four complementary shades often creates a beautiful result without making the design look too busy.
- Tips for Making Polka Dot Nail Art Last Longer
A few simple techniques can help your manicure stay attractive for longer.
Always start with clean, dry nails and apply thin layers of polish. Let each layer dry properly before moving to the next step. Avoid placing too many dots close together, especially if the polish is thick or slow to dry.
Finish with a good-quality top coat, covering the tips of your nails to help reduce chipping. If you use your hands frequently for cleaning or household tasks, wearing protective gloves can also help preserve your manicure.
Remember that patience is important. Waiting for the dots to dry before applying the top coat helps prevent smearing and keeps the design looking neat.
Conclusion
Colorful polka dot nails are a fun, affordable, and beginner-friendly way to express your creativity through nail art. Whether you choose classic rainbow dots, soft pastel patterns, elegant nude designs, or bold black-and-white combinations, this manicure style offers endless possibilities.
The best part is that you can create beautiful designs with only a few nail polish colors and simple household tools. You can experiment with dot sizes, color combinations, and different arrangements until you find a style that suits your personality.
If you are looking for an easy nail art idea that looks attractive without requiring professional techniques, colorful polka dot nails are an excellent choice. Start with a simple design, try different color combinations, and enjoy creating your own unique manicure at home.