Beautiful nail art does not always require expensive tools, professional equipment, or a trip to the salon. With a little creativity, many everyday household items can become useful nail-art tools. From toothpicks and bobby pins to tape, sponges, and even plastic wrap, simple objects around your home can help you create stylish designs without spending much money.
DIY nail art is also a fun way to experiment with different colors, patterns, and techniques. Whether you are a beginner trying nail art for the first time or someone who enjoys creating new designs, household items can make the process easier and more interesting. Here are some creative DIY nail-art ideas you can try at home.
- Toothpick Nail Art
A toothpick is one of the easiest household items to use for detailed nail designs. Its pointed end can help you create tiny dots, lines, swirls, flowers, and abstract patterns.
Start by applying a base color and allowing it to dry. Place a small drop of another nail polish on a piece of foil or a smooth surface. Dip the tip of the toothpick into the polish and gently draw your desired design.
For an easy flower, make five small dots around a central dot. You can use a different color for the center to make the flower stand out. Toothpicks are especially useful when you want thin lines but do not have a nail-art brush.
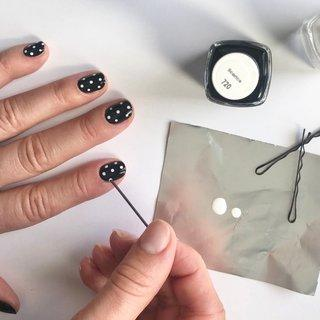
- Bobby Pin for Perfect Dots
If you want evenly sized dots, a bobby pin can work as a simple dotting tool. The rounded end creates a neat circular shape when dipped into nail polish.
Apply your base color and let it dry. Open the bobby pin and use the rounded tip to pick up a small amount of polish. Press it gently onto the nail to create a dot.
You can make polka dots, flowers, smiley faces, or dotted French tips. For a playful design, create several dots in different sizes and colors across each nail.
- Makeup Sponge for Ombre Nails
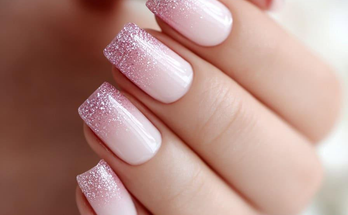
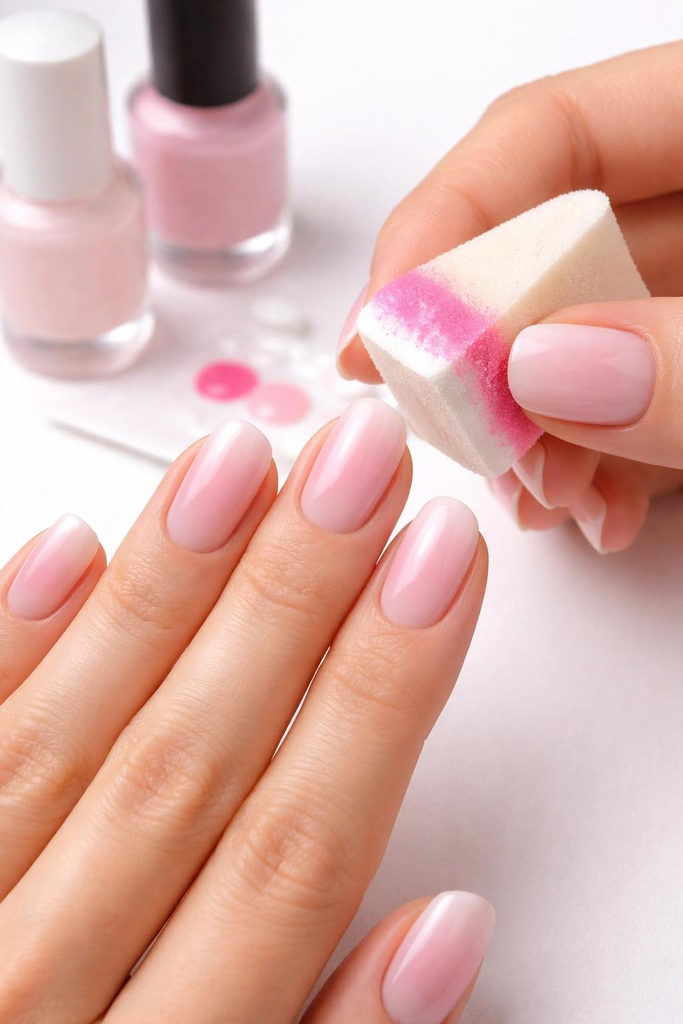
A small makeup sponge is perfect for creating a soft ombre effect. You can use an old clean makeup sponge or a small piece of cosmetic sponge.
Choose two or three nail-polish colors that blend well together. Paint horizontal stripes of the colors directly onto the sponge, slightly overlapping each shade. Gently press the sponge onto the nail using a dabbing motion.
Repeat the process until the colors look blended. Clean the skin around your nails with a small brush or cotton swab dipped in nail-polish remover. Finish with a clear top coat to smooth the surface.
- Tape for Clean Nail Designs
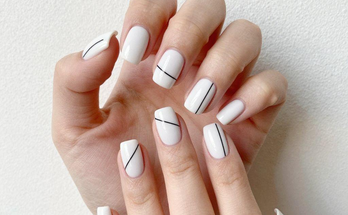
Household tape can help you create sharp geometric patterns and French-tip designs. Regular transparent tape or thin decorative tape can work for this technique.
First, apply your base color and wait until it is completely dry. Cut small pieces of tape and place them across the nail to create stripes, triangles, squares, or diagonal sections.
Apply another polish color over the exposed part of the nail. Carefully remove the tape while the polish is still slightly wet. This reveals clean lines underneath.
For beginners, diagonal color blocking is particularly easy. Try combinations such as pink and white, black and silver, or blue and nude.
- Plastic Wrap for Marble Effects
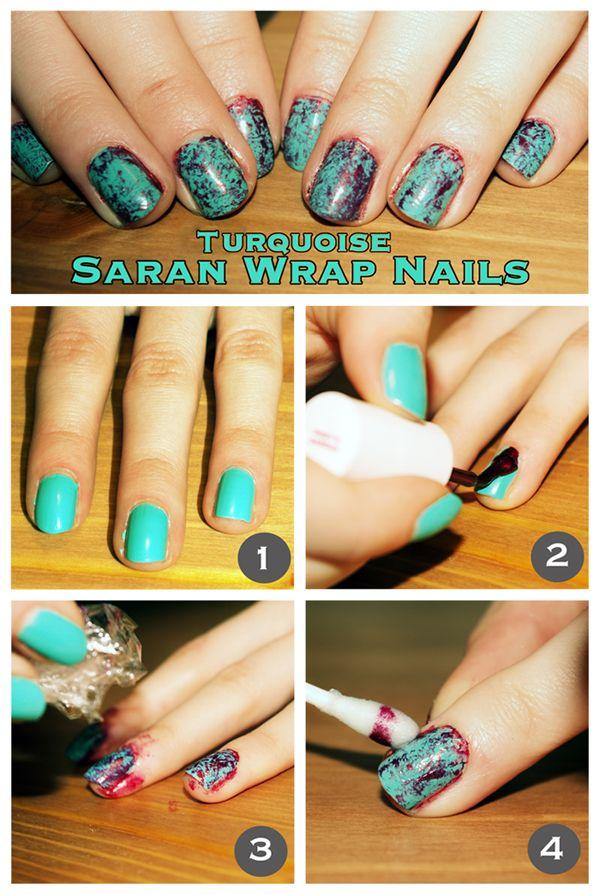
Plastic wrap can create a beautiful textured or marble-like appearance. This technique is simple and does not require precise drawing skills.
Apply your first nail-polish color and allow it to dry. Add small drops of a second color over the nail. Before the polish dries, gently dab the surface with a small piece of crumpled plastic wrap.
The plastic wrap mixes the colors slightly and creates an irregular pattern. You can use contrasting shades for a dramatic look or similar shades for a softer marble effect.
- Cotton Swab Nail Art
Cotton swabs can be useful for both creating designs and cleaning mistakes. The cotton tip can create larger dots than a toothpick or bobby pin.
Dip the end of a clean cotton swab into nail polish and gently press it onto your nail. Create rows of dots, flower petals, or simple abstract shapes.
Cotton swabs are also helpful when you accidentally get polish around the cuticle area. Lightly moisten one with nail-polish remover and carefully clean the edges.
- Sewing Needle for Fine Lines
A sewing needle can be used to create very thin patterns, especially when you want a delicate marbled or swirled effect. Because needles are sharp, handle them carefully and avoid pressing them into the skin.
Apply a base coat and then add small drops of another polish while the base is still wet. Use the needle to gently pull the drops into curves, waves, or feather-like patterns.
You can create simple flower petals, hearts, or abstract designs using this method. Keep the pressure light so you do not scratch the nail surface.
- Newspaper for Textured Nails
Old newspaper can be transformed into a creative nail-art tool. Newspaper-transfer nails create the appearance of tiny printed letters across the nails.
Apply a light-colored polish, such as white, cream, or pale gray, and allow it to dry completely. Cut small pieces of newspaper containing visible text. Place each piece over the nail and press it gently.
A small amount of rubbing alcohol can help transfer the printed text. Remove the paper carefully and seal the design with a clear top coat.
This look is especially attractive with neutral or monochromatic colors.
- Rubber Band for French Tips
A rubber band can help create a curved French-tip guide. Stretch a small clean rubber band across the nail near the tip, keeping it securely positioned.
Paint the exposed nail tip with your chosen color. Carefully remove the rubber band to reveal a curved line.
This technique can take some practice because the rubber band needs to remain stable. Once mastered, it can help you create classic French tips as well as colorful variations.10. Hair Comb for Striped Designs
A fine-tooth comb can be used to create unusual textured patterns. Place a small amount of polish on the nail and gently drag the comb through it before it dries.
Try using two contrasting colors for a striped or wave-like effect. For example, a white base with pastel shades can create a soft, artistic appearance.
Make sure the comb is clean and use an item that you do not mind getting nail polish on.
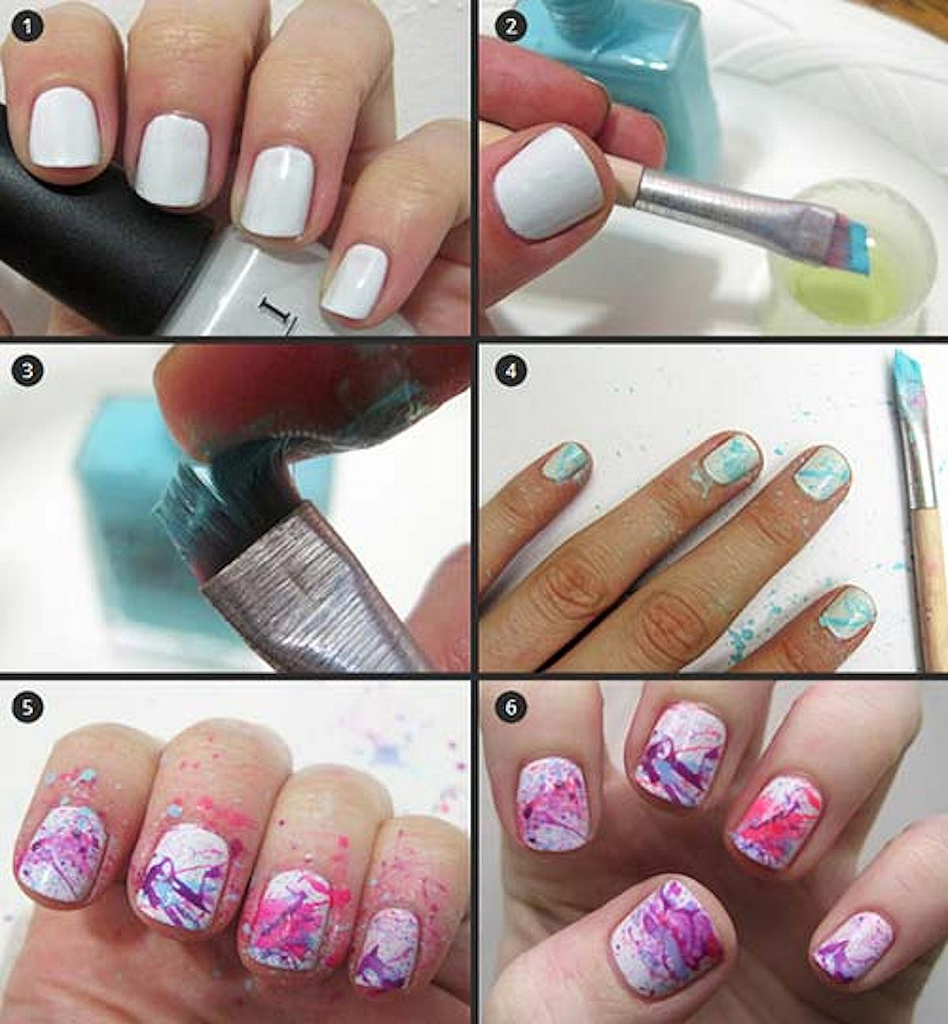
- Toothbrush for Splatter Nails
An old clean toothbrush can create a fun splatter effect. Apply your base polish and allow it to dry.
Put a small amount of another nail polish onto the toothbrush bristles. Hold the brush over the nail and gently flick the bristles with your finger. Tiny droplets of polish will land on the nail, creating a speckled effect.
You can use one color for a subtle design or several colors for a colorful artistic finish. Protect your work surface because splatter can spread beyond the nails.
- Simple Household Nail-Art Tips
The most important part of DIY nail art is preparation. Start with clean, trimmed nails and apply a base coat. A base coat can help protect the natural nail and create a smoother surface for polish.
Allow each layer to dry properly before adding another. Rushing can cause smudges and uneven designs. Keep cotton swabs and nail-polish remover nearby so you can correct small mistakes.
It is also important to keep household tools clean. Do not share personal tools, and avoid using objects that are dirty, rusty, sharp in a way that could injure you, or contaminated with chemicals.
Finally, always finish your design with a clear top coat. It can add shine, smooth the surface, and help your nail art last longer.
Conclusion
DIY nail art using household items proves that creativity is often more important than expensive equipment. Toothpicks can become detail brushes, bobby pins can create dots, makeup sponges can produce ombre effects, and tape can help make clean geometric patterns.
The best part is that you can experiment with techniques without needing a large collection of professional nail-art tools. Start with simple designs and gradually try more complicated patterns as your confidence grows. With a few everyday objects, some nail polish, and a little patience, you can create attractive nail art from the comfort of your home.